


Stage 1: Start with a photograph
For this demonstration, I found a nice image of a baseball, mitt and bat. I usually compose my own still-life setup or take my own photograph to work from. However, I was in a pinch and this image that someone else photographed was really nice.
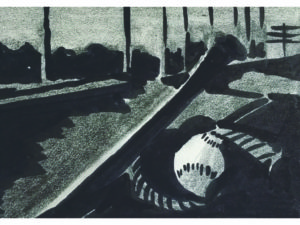
Stage 2: Draw a small value sketch
Most of my paintings begin with a value sketch. Usually I do this in pencil and/or marker. This value sketch measures about 3×4 inches and is on regular copy paper. A value sketch helps me to see the overall design of a painting and allows me to plan where the focal point of the image will be drawn. It also becomes my guide as I draw onto the canvas.

Stage 3: Draw on the canvas
Next I made an accurate drawing on the canvas and defined the hard edges. I used a pencil to make the initial drawing, then once I had the correct proportions and angles, I went over them with a permanent marker. This way the lines remain.
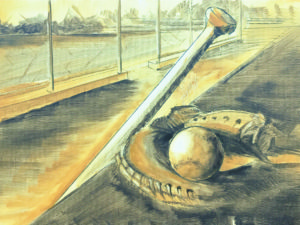
Stage 4: Create atmosphere with values and edges
Using an odorless solvent and oil paint, I cover the canvas with a light wash of one or two colors of paint. Using a paper towel, I wipe away areas of the paint where I want my lighter values to be. My marker lines are a good guide and help me keep sharp edges where I want them.
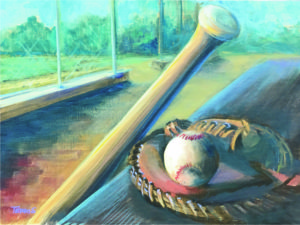
Stage 5: Add color
When I go to add color, I mix the primary colors red, blue and yellow. Also I use some white to lighten the colors that need to be lighter in value, and a brown like raw umber is good as a neutral dark.
Comments are closed.